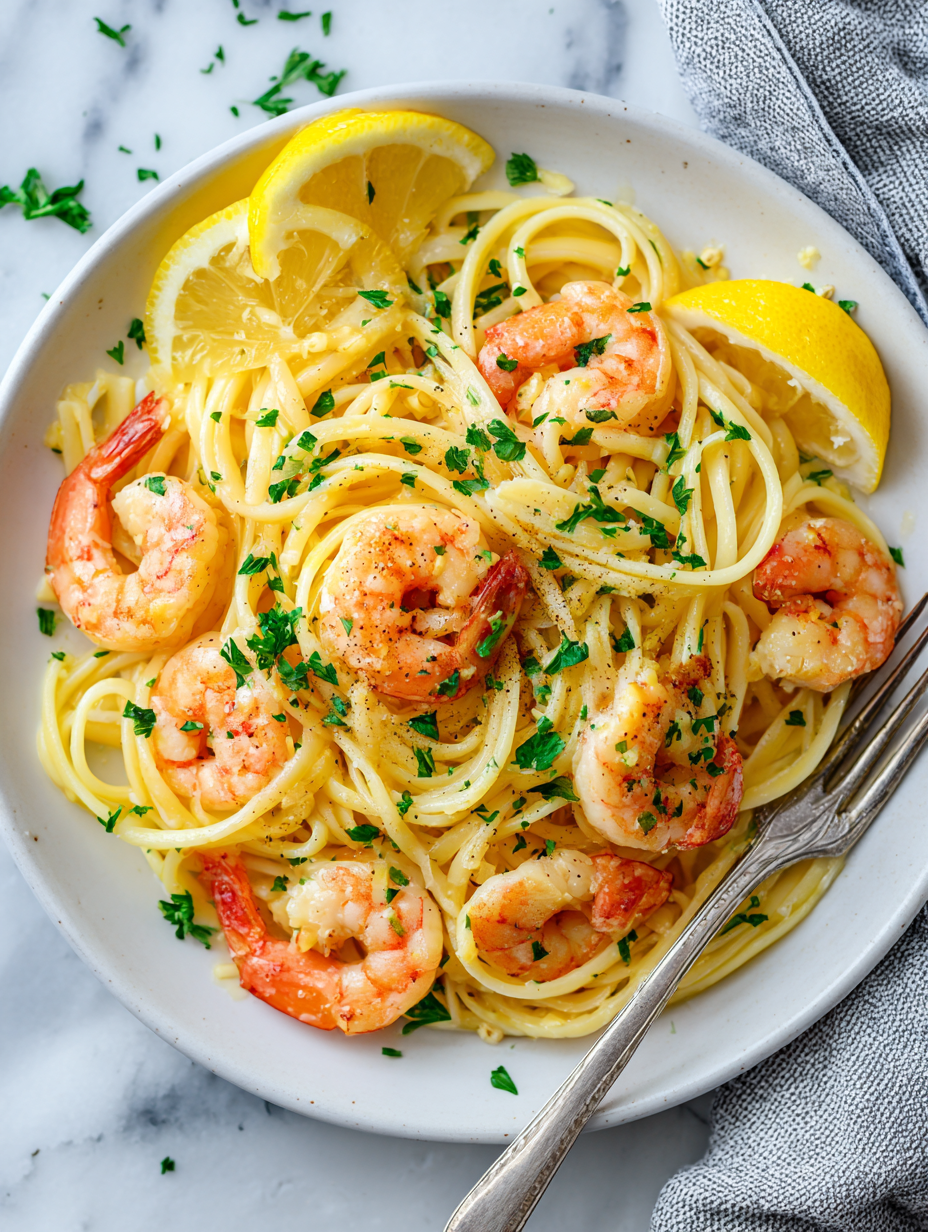
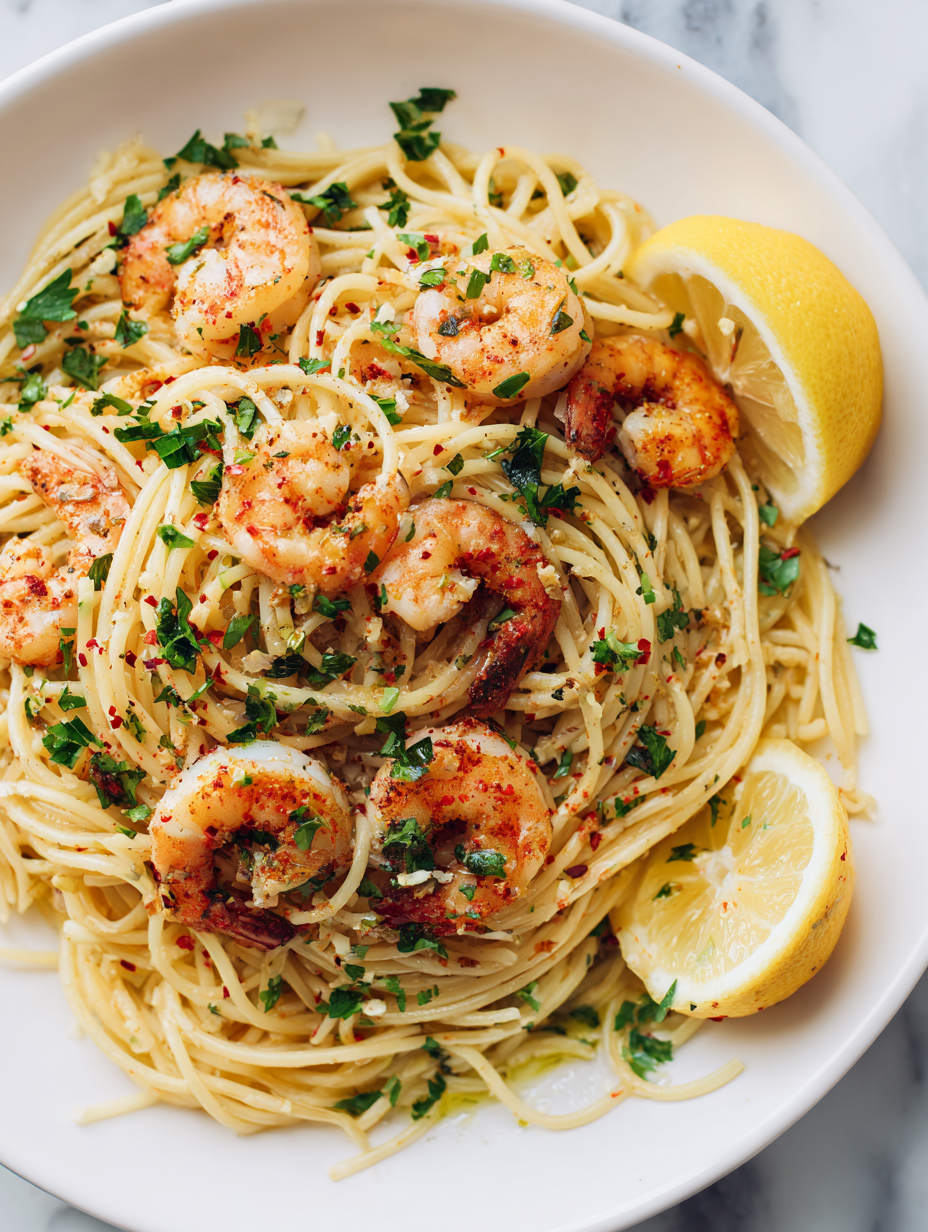
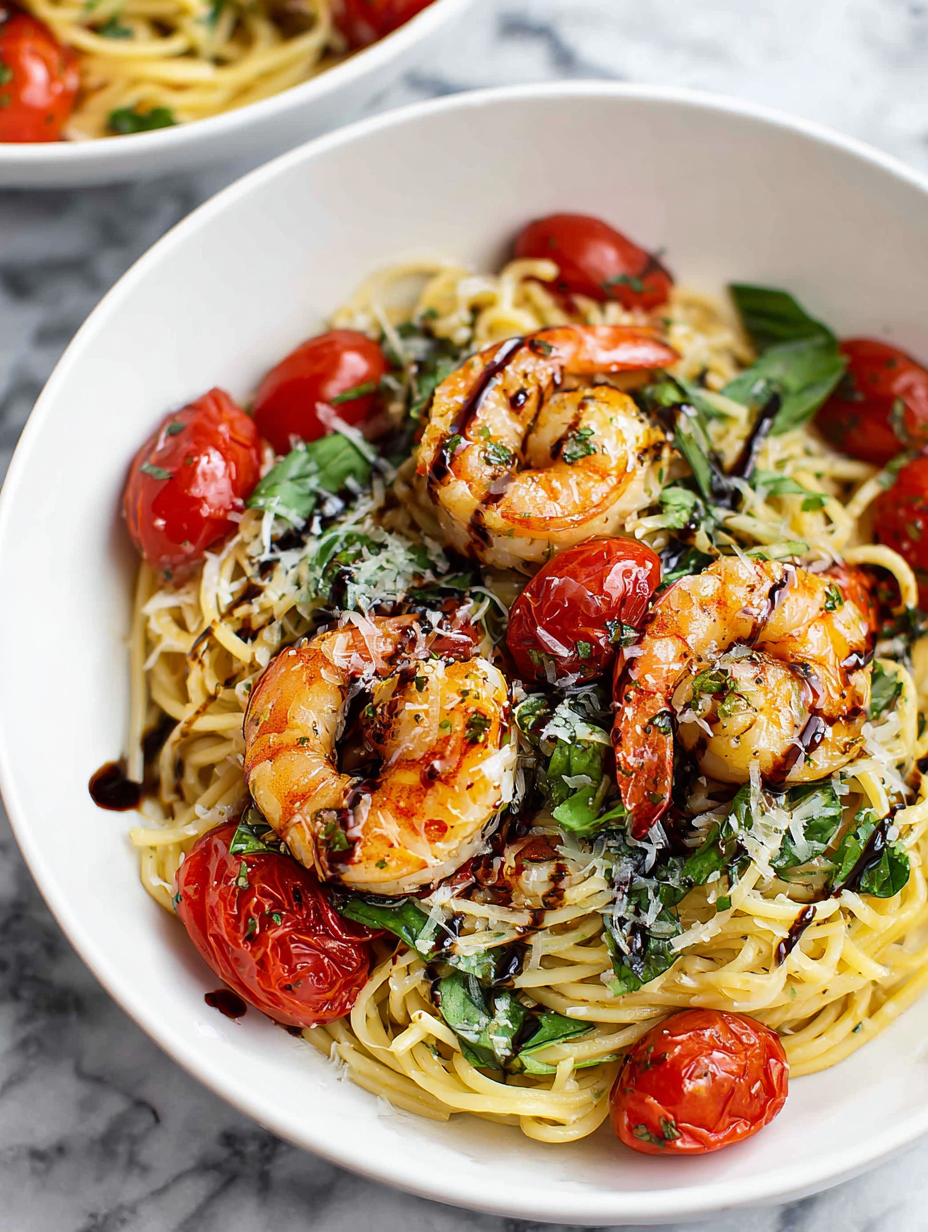
Author: EllaDavis

  • Spooky Sophistication: The Haunted Spider Web Cake

    Spooky Sophistication: The Haunted Spider Web Cake

    Every October, I find myself craving a dessert that’s as visually arresting as it is delicious. The Halloween Spider Web Cake hits that sweet spot, with its intricate web design that makes it look like a spooky masterpiece. But beneath the cobwebs lies a moist, rich cake that surprises you with its depth of flavor.

    What excites me most about this recipe is how easily it transforms a simple chocolate or vanilla cake into a Halloween spectacle. It’s a chance to unleash your inner artist while filling your home with the warm aroma of baked goodness. Plus, it’s a fun project, perfect for both chaos and celebration in equal measure.

    WHY I LOVE THIS RECIPE?

    • The web pattern is so much fun to create—like making edible art
    • The contrasts of dark chocolate and sweet frosting make every bite a delight
    • It’s nostalgic—reminds me of childhood costumes and candy hunts
    • The endless decorating options keep it playful and unique each time

    AVOID MY DISASTER (You’re Welcome)

    • FORGOT to let the frosting set before dragging the spider web—ended up smudging everything. Chill and reapply.
    • DUMPED hot frosting on the cake—burned some frosting flavor and made the web soggy. Cool it first.
    • OVER-TORCHED the chocolate web—smelled burnt, but a quick scrape saved the design. Lower the heat next time.
    • MISSED a spot on the web pattern—looked weird but was easily fixed with an extra piping detail and a smile.

    QUICK FIXES THAT SAVE YOUR DAY

    • When frosting cracks, gently warm it and remix for a smooth finish.
    • Patch web tears with a dab of melted chocolate for seamless details.
    • Shield the cake from drafts—they can cause uneven frosting crusts.
    • When web sugar melts, cool quickly with a fan for crisp lines.
    • Splash on sprinkles or edible glitter to hide any flaws—shimmer always distracts.

    Halloween Spider Web Cake

    This cake features a moist, rich chocolate or vanilla base decorated with an intricate spider web pattern made from melted chocolate or icing. The final appearance is a striking, spooky design with a smooth, tender crumb and a glossy web topping that creates a festive Halloween centerpiece.
    Prep Time 30 minutes
    Cook Time 35 minutes
    Total Time 1 hour 5 minutes
    Servings: 8
    Course: Main Course
    Cuisine: American
    Calories: 420

    Ingredients
      

    • 2 cups all-purpose flour for cake batter
    • 1 1/2 cups granulated sugar sweetness and structure
    • 1/2 cup unsweetened cocoa powder for chocolate flavor
    • 1 cup buttermilk moisture and tang
    • 1/2 cup vegetable oil moisture and richness
    • 3 large eggs for structure and binding
    • 2 teaspoons vanilla extract flavor enhancer
    • 1 1/2 cups powdered sugar for frosting
    • 1/2 cup unsalted butter for frosting
    • 2 cups confectioners’ icing to create web design
    • 1/2 cup dark chocolate or black icing for web pattern

    Equipment

    • Mixing bowls
    • Cake pans
    • Offset spatula
    • Piping bag
    • Baking sheet
    • Cooling rack
    • Chocolate melting pot or microwave
    • Small piping tips

    Method
     

    1. Preheat your oven to 350°F (175°C). Grease two 8-inch cake pans and line the bottoms with parchment paper for easy removal.
    2. In a large mixing bowl, whisk together the flour, cocoa powder, and sugar until well combined and slightly aerated.
    3. Add the eggs, buttermilk, vegetable oil, and vanilla extract to the dry mixture. Mix on medium speed until the batter is smooth, thick, and evenly combined, about 2-3 minutes. The batter should be pourable but not runny.
    4. Divide the batter evenly between the prepared cake pans. Smooth the tops with an offset spatula to ensure even layers.
    5. Bake in the preheated oven for 30-35 minutes, or until a toothpick inserted into the center comes out clean. The cake should spring back when lightly pressed.
    6. Remove the cakes from the oven and let them cool in the pans for 10 minutes. Then, transfer them to a cooling rack and let them cool completely before frosting.
    7. In a mixing bowl, beat the softened butter until creamy. Gradually add the powdered sugar and confectioners’ icing, beating until smooth and fluffy. This creates a stable frosting suitable for decorating.
    8. Once the cakes are completely cooled, spread a layer of frosting on top of one cake layer. Place the second cake on top and apply a thin crumb coat around the entire cake. Chill for 20 minutes to set.
    9. Spread a smooth, even layer of frosting over the chilled cake, creating a clean surface for decorating. Chill again for 10 minutes to firm up the frosting.
    10. In a melting pot or microwave, melt the dark chocolate or black icing until smooth and glossy. Let it cool slightly so it thickens to piping consistency.
    11. Fill a piping bag fitted with a small tip with the melted chocolate and carefully pipe concentric circles and radial lines across the top of the cake to form the web pattern. Use a small spatula or toothpick to straighten and perfect the web.
    12. Refrigerate the decorated cake for at least 30 minutes to allow the web design to set and firm up.
    13. Slice and serve this spooky, web-embellished cake to enjoy the moist crumb contrasted with the glossy web pattern. Perfect for Halloween festivities!

    Notes

    For a more dramatic web, use a fine piping tip and take your time to trace the web pattern carefully. Chill the decorated cake to help set the web. Feel free to dust the web with edible glitter for extra sparkle.

    This Spider Web Cake captures the spirit of Halloween with its spooky design and festive flavors. It’s more than a dessert; it’s a conversation starter, a visual delight, and a chance to get creative in the kitchen during this haunting season.

    As the days grow shorter and the nights colder, this cake brings a sense of fun and nostalgia to my table. Sharing it with friends or family turns a simple gathering into a memorable celebration of all things spooky and sweet. Baking it becomes a ritual that makes October feel even more magical.

  • The Secret to a Perfect Mango Slushie That Magic-ifies Your Summer

    The Secret to a Perfect Mango Slushie That Magic-ifies Your Summer

    Imagine a summer afternoon where the air smells like ripening mangoes. The vibrant orange color of the fruit becomes the centerpiece of your refreshment, dripping with sweet nectar. But here’s a twist: I craft my mango slushie with a splash of coconut water and a hint of lime, elevating the usual chill into something extraordinary.

    This recipe is my personal rescue from the sweltering heat, and I’ve found that the secret lies in blending a frozen mango chunk with just enough citrus to brighten every sip. It’s not just a drink; it’s a moment of cooling joy that turns a simple summer snack into a celebration.

    Let’s embrace the chaos of ripe mangoes, the instant gratification of a frozen treat, and the nostalgic smile that only a mango slushie can inspire.

    Mango Coconut Lime Slushie

    This mango slushie is a refreshing cold beverage made by blending ripe mango chunks with coconut water and lime juice. The key ingredients create a smooth, icy texture with vibrant flavor and a bright orange hue, perfect for hot summer days.
    Prep Time 10 minutes
    Total Time 10 minutes
    Servings: 2
    Course: Main Course
    Cuisine: Fusion
    Calories: 150

    Ingredients
      

    • 2 cups frozen mango chunks preferably ripe and juicy
    • ½ cup coconut water for natural sweetness and hydration
    • 1 tablespoon lime juice freshly squeezed for brightness
    • 1 cup ice cubes to thicken and chill the mixture

    Equipment

    • Blender
    • Measuring Cup
    • Citrus juicer

    Method
     

    1. Add the frozen mango chunks to your blender.
    2. Add the ice cubes to the blender to help create a thick, slushy texture.
    As the summer heat blazes on, this mango slushie offers a quick escape, a burst of cooling sweetness in every glass. The fresh, fruity aroma alone is enough to bring a smile on even the busiest days.

    Sharing this easy recipe with friends or enjoying it quietly in the sun makes every moment feel a little more special. It’s a reminder that sometimes, the simplest ingredients create the most memorable experiences, especially when they’re this delicious and refreshing.

  • Sparkling Summer Salsa with a Curious Twist

    Sparkling Summer Salsa with a Curious Twist

    Imagine a salsa that vibrates with the crispness of freshly plucked tomatoes and the bright zing of lime. This recipe isn’t just a mix of ingredients—it’s a symphony of seasonal flavors that transform a simple garden harvest into a tabletop celebration. Perfect for those lazy sunny afternoons or lively evening barbecues, this salsa adds a fresh burst to any plate.

    What makes this salsa special is its unexpected ingredient pairing—think a dash of mint or a hint of honey to balance the acidity. It’s about discovering harmony in chaos, and that’s what I love about crafting this recipe. A little chaos, a lot of flavor, and a whole lot of summer in each spoonful.

    This isn’t just about making salsa; it’s about creating a refreshing experience that brightens up your plate and lifts your mood. The process is almost meditative—chopping, stirring, tasting—each step heightening the anticipation of that first perfect bite. It’s simplicity wrapped in vibrant, refreshing layers, meant to be enjoyed at open-air tables or cozy kitchen counters.

    Fresh Tomato and Mint Salsa

    This salsa combines ripe, freshly chopped tomatoes with bright lime juice and fragrant mint leaves, resulting in a vibrant, crisp condiment. The mixture has a chunky texture with a lively appearance, perfect for adding a fresh burst of flavor to any dish or snack.
    Prep Time 15 minutes
    Total Time 15 minutes
    Servings: 4
    Course: Main Course
    Cuisine: Mediterranean, Mexican
    Calories: 50

    Ingredients
      

    • 3 cups cherry tomatoes or grape tomatoes preferably ripe and colorful
    • 1 small red onion finely chopped
    • 1 large lime juiced, seeds removed
    • 1 handful fresh mint leaves chopped
    • 1 clove garlic minced
    • 1 teaspoon honey optional, balances acidity
    • to taste salt
    • to taste freshly ground black pepper

    Equipment

    • Chef’s knife
    • Cutting board
    • Mixing bowl
    • Spoon or spatula

    Method
     

    1. Chop the tomatoes into roughly 1/2-inch pieces, then transfer them to a large mixing bowl. This helps release their juices and forms the base of the salsa.
    2. Add the finely chopped red onion to the bowl, mixing it gently with the tomatoes. The onion adds crunch and a sweet sharpness to the salsa.
    3. Squeeze the juice of a lime over the mixture, stirring to evenly coat the ingredients. The lime adds brightness and helps marry the flavors together.
    4. Finely chop the fresh mint leaves, then sprinkle them into the bowl. The mint gives a refreshing aroma and flavor contrast.
    5. Add the minced garlic and a teaspoon of honey to the bowl, stirring well. The garlic imparts pungency, while the honey balances the acidity with subtle sweetness.
    6. Season with salt and freshly ground black pepper to taste, mixing until all ingredients are well integrated. This enhances the overall flavor profile.
    7. Let the salsa sit for about 5 minutes to allow the flavors to meld and the mixture to develop a vibrant, juicy appearance.
    8. Give the salsa a final gentle stir, then taste and adjust seasoning if needed. The salsa should be bright, fresh, and slightly chunky with visible herbs and tomato pieces.

    Notes

    For an extra touch, add diced cucumber or jalapeño for more complexity. Serve immediately with tortilla chips or alongside grilled dishes.
    As the season winds down, this fresh salsa remains a reminder of the vibrancy and spontaneity of summer. It’s a quick, colorful escape from the ordinary—perfect for last-minute gatherings or a solo snack that feels like an instant vacation.

    In a world full of complex recipes, sometimes the simplest things—like this lively salsa—bring the biggest joy. Keep this one handy for when you need a quick burst of freshness, a splash of color, or a reminder that good things often come from imperfect, joyful experimentation.

  • Enchanted Midnight: The Halloween Black Magic Margarita

    Enchanted Midnight: The Halloween Black Magic Margarita

    As Halloween approaches, I find myself craving drinks that carry a hint of mystery and allure. The Black Magic Margarita isn’t just a cocktail—it’s an experience wrapped in velvety darkness, with a whisper of smoky intrigue. The vivid black hue makes it perfect for spooky gatherings, turning any party into an enchanted night.

    What makes this recipe truly special is its playful transformation of the classic margarita. It’s like capturing a secret potion—smooth, slightly bitter, with a surprising twist of citrus that brightens the darkness. And the best part? It’s surprisingly easy to whip up, even with a rushed schedule or last-minute guests.

    Black Magic Margarita

    The Black Magic Margarita is a vibrant cocktail featuring a deep black hue achieved with activated charcoal or black liqueur. It combines tequila, citrus, and a smoky element, resulting in a smooth, velvety drink with a hint of bitterness and bright citrus notes, finished with a frosty appearance.
    Prep Time 5 minutes
    Total Time 5 minutes
    Servings: 2
    Course: Main Course
    Cuisine: Mexican
    Calories: 180

    Ingredients
      

    • 2 oz tequila blanco
    • 1 oz lime juice freshly squeezed
    • 0.75 oz orange liqueur
    • 1 tsp activated charcoal powder food grade, for color
    • 0.5 oz simple syrup optional, adjust sweetness
    • ice ice cubes for shaking and serving

    Equipment

    • Cocktail shaker
    • Strainer

    Method
     

    1. Fill your cocktail shaker halfway with ice cubes to chill it and prepare for shaking.
    2. Add the tequila, lime juice, orange liqueur, activated charcoal, and simple syrup into the shaker.
    3. Securely close the shaker and shake vigorously for about 15 seconds until the mixture is well combined and chilled, and the liquid turns a striking black.
    4. Remove the shaker lid and strain the dark, silky cocktail into prepared glasses, ensuring a smooth surface with no ice shards.
    5. Garnish with a lime wedge or a twists of citrus peel for a pop of color and aroma.
    6. Serve immediately, enjoying the velvety texture and enchanting black appearance of the Margarita.

    Notes

    Using food-grade activated charcoal gives the drink its mysterious black color without affecting flavor. Adjust sweetness with additional simple syrup if desired.
    This Black Magic Margarita is a reminder that Halloween drinks can be just as fun as the costumes themselves. Its rich color and deep flavor make it stand out amidst usual party fare or quiet midnight sips. The moment the smoky scent hits your nose, you’ll know this cocktail is a spellbinding addition to your festivities.

    Whether you’re hosting a haunted soirée or just treating yourself to something magical, this cocktail adds a splash of mystique to any occasion. It’s a perfect way to toast to the spooky season, with a drink that looks as mysterious as the night itself.

  • Chill Out with the Unusual Milkshake Slushie Twist

    Chill Out with the Unusual Milkshake Slushie Twist

    Sometimes, the simplest drinks get a wild makeover, and that’s where my obsession with milkshake slushies begins. Picture this: a creamy, fruity milkshake suddenly transformed into a frosty, icy delight that melts on your tongue faster than you can say “summer.” This is more than just a drink; it’s a playful escape from the usual, a burst of nostalgia with a dash of chaos.

    Using a secret ingredient—think a splash of sparkling water or a hint of citrus zest—turns your basic milkshake into a snow-capped treat that’s perfect for spontaneous gatherings. It’s the kind of recipe that invites improvisation and joy, making every sip uniquely yours. Prepare for a chill experience that hits all the right icy notes and keeps you cool no matter how hot things get.

    Milkshake Slushies

    Milkshake slushies are icy, frosty beverages made by blending creamy milkshakes with added sparkling water or citrus zest, resulting in a snow-capped, refreshing treat. The texture is thick yet melts quickly on the tongue, offering a playful and nostalgic drinking experience.
    Prep Time 10 minutes
    Total Time 10 minutes
    Servings: 2
    Course: Main Course
    Calories: 250

    Ingredients
      

    • 2 cups vanilla ice cream or your preferred flavor
    • 1 cup milk
    • 2 tablespoons sugar optional for sweetness
    • 1 teaspoon citrus zest lemon or lime for zing
    • 1/2 cup sparkling water to create icy fizz

    Equipment

    • Blender
    • Measuring cups or spoons

    Method
     

    1. Add the vanilla ice cream, milk, sugar, and citrus zest to the blender. Blend on high until the mixture is smooth and creamy, with no lumps remaining.
    2. Pour in the sparkling water and blend again briefly just until combined, about 10 seconds. The mixture will start to foam and lighten in texture.
    3. Stop the blender and check the consistency; it should be thick but scoopable and sparkling with tiny ice crystals visible on the surface.
    4. Pour the mixture into glasses, filling them to the brim. The icy slush will have a frosty, snow-capped appearance with a slight shimmer from the sparkling water.
    5. Serve immediately with colorful straws or garnish with a twist of citrus for added flair. The drink should be cold, frosty, and irresistibly refreshing!

    This milkshake slushie isn’t just a cooling option; it’s an experience in texture and flavor, perfect for lazy summer afternoons or unexpected heat waves. Its simplicity makes it both a nostalgic reminder of childhood and a trendy twist for your current season.

    By embracing the chaos of blending and freezing, you create something unexpectedly delightful. It’s a recipe that laughs in the face of ordinary drinks, embracing the messy, the sweet, and the wonderfully chilled—just how summer should feel.

  • Spookyly Delicious Halloween Jack-o’-Lantern Stuffed Peppers

    Spookyly Delicious Halloween Jack-o’-Lantern Stuffed Peppers

    As autumn leaves crunch beneath your boots, I love turning the simple bell pepper into a playful masterpiece. These Halloween Stuffed Bell Pepper Jack-o’-Lanterns bring a burst of fun to the dinner table, especially when everyone needs a cheerful distraction from the creeping chill outside. It’s almost like creating edible art, a small act of joy in preparing something both spooky and savory.

    What makes this recipe stand out is the nostalgic charm combined with a whisper of chaos—the kind only Halloween can inspire. The aroma of seasoned filling mingling with roasted pepper skin creates a cozy yet mischievous scent that lingers till the last bite. Plus, it’s perfect for making little ones giggle or impressing guests with your creative flair.

    Halloween Stuffed Bell Pepper Jack-o’-Lanterns

    This dish features hollowed-out bell peppers carved into pumpkin-like faces, filled with a seasoned savory mixture, and roasted until tender with slightly blistered skins. The final presentation resembles cheerful jack-o’-lanterns, combining vibrant colors with a hearty, flavorful filling.
    Prep Time 15 minutes
    Cook Time 30 minutes
    Total Time 45 minutes
    Servings: 4
    Course: Main Course
    Cuisine: American
    Calories: 350

    Ingredients
      

    • 4 large bell peppers preferably orange or red for vibrant jack-o’-Lanterns
    • 1 lb ground beef or turkey, cooked and drained
    • 1 cup cooked rice white or brown rice
    • 1/2 cup shredded cheese cheddar or Monterey Jack
    • 1 small onion finely chopped
    • 2 cloves garlic minced
    • 1 teaspoon paprika
    • to taste salt and pepper
    • 2 tablespoons olive oil
    • 1 tablespoon honey or maple syrup for glazing

    Equipment

    • Chef’s knife
    • Baking sheet
    • Mixing bowls
    • Spoon

    Method
     

    1. Preheat your oven to 400°F (200°C). Use a sharp knife to carefully cut the tops off the bell peppers and scoop out the seeds and membranes, creating hollow pumpkin shapes.
    2. In a skillet, heat olive oil over medium heat. Add chopped onion and minced garlic; sauté until fragrant and translucent, about 2-3 minutes.
      4 large bell peppers
    3. Add ground beef to the skillet, breaking it apart with a spoon. Cook until browned and cooked through, about 5-7 minutes. Season with paprika, salt, and pepper, and stir to combine.
      4 large bell peppers
    4. Mix in cooked rice and shredded cheese into the beef mixture until well combined. Remove from heat and set aside.
      4 large bell peppers
    5. Stuff each hollowed-out bell pepper generously with the filling, pressing slightly to pack it in.
    6. Arrange the stuffed peppers on a baking sheet lined with parchment paper. Brush the outer skin lightly with honey or maple syrup for a glossy finish and sweet caramelization.
      4 large bell peppers
    7. Place the peppers in the oven and roast for about 25-30 minutes, until the peppers are tender and the skins start to blister and caramelize slightly.
    8. Remove from oven and let cool slightly. Use a knife to carve pumpkin faces on the peppers, creating eyes, nose, and mouth with cutouts.
    9. Serve the Jack-o’-Lantern stuffed peppers warm, with the cheese melted and the carved face revealing the savory filling inside.
    10. Enjoy this playful, seasonal dish that combines colorful presentation with hearty flavors!

    Notes

    Carve the faces carefully to avoid splitting the peppers. Using colorful peppers enhances the festive look.

    This dish feels like a celebration of the season—bright, bold, and full of personality. It’s perfect for themed family dinners or a playful party centerpiece that sparks conversation. As the season shifts, dishes like this remind us to embrace the fun in food and the joy of festive traditions.

    Enjoying this recipe means embracing the chaos of holiday cooking and the satisfaction of making something memorable. Plus, who can resist biting into a cheerful pumpkin face with every flavorful, spice-kissed forkful? It’s a little reminder that Halloween isn’t just for costumes, but also for creating delicious memories.

  • Chill Out: The Frozen Margarita Slushie You Never Knew You Needed

    Chill Out: The Frozen Margarita Slushie You Never Knew You Needed

    While most think of margaritas as a summer cocktail, I’ve discovered a way to celebrate year-round with a twist — the frozen margarita slushie. This icy treat blends the tang of lime with a smooth boozy kick, perfect for those days when just a regular drink won’t do. It’s like a frozen fiesta in every sip, whispering memories of sun-soaked afternoons and carefree vibes.

    What makes this recipe stand out? It’s simplicity meets creativity. You don’t need fancy equipment or rare ingredients — just some frozen lime juice, tequila, and a bit of sweet charm. The best part? It’s endlessly customizable, so you can tune the tartness or sweetness to match your mood and palate.

    WHY I LOVE THIS RECIPE?

    • It’s a stress-relieving blend that turns any dull day into a mini celebration with tart and salty bites.
    • The frosty texture offers a cool escape from the heat, tingling your senses with every sip.
    • Mixing it up sparks my creative spirit — experimenting with different fruit juices feels almost poetic.
    • It’s the perfect quick fix for spontaneous gatherings or solo chill sessions.
    • Nostalgia floods in — reminds me of beach trips and childhood slushies, just elevated.

    AVOID MY DISASTER (You’re Welcome)

    • FORGOT to chill the glasses? Rinse with ice water to keep your slushie icy longer.
    • DUMPED in too much tequila? Add more lime juice or simple syrup to balance the flavors.
    • OVER‑TORCHED the rim? Use a damp cloth to clean, then reapply salt gently.
    • SNAPPED the blender? Let the ingredients thaw slightly or use a different device.

    QUICK FIXES THAT SAVE YOUR DAY

    • When mixture isn’t icy enough, splash in more frozen lime or ice cubes.
    • Patch flavor by stirring in a splash of orange liqueur for sweetness and depth.
    • Shield the rim with a damp paper towel before applying salt for a neat edge.
    • When chaos strikes, crack open a can of lemon-lime soda for quick fizz and flavor.
    • When in doubt, smell the mix—if it’s flat, a squeeze more lime awakens the senses.

    This frozen margarita slushie isn’t just a cocktail, it’s a feeling — refreshing, bold, and utterly liberating. As the seasons change, it adapts seamlessly, promising cool comfort in every glass. No matter the occasion, it’s ready to serve, slushie style, when you crave a little sensory escape.

    Frozen Margarita Slushie

    This frozen margarita slushie combines lime juice and tequila, blended with ice to create an icy, smooth texture. The mixture results in a vibrant, frosty drink with a tart and slightly salty flavor profile, perfect for a refreshing treat at any time of year.
    Prep Time 10 minutes
    Total Time 10 minutes
    Servings: 4
    Course: Main Course
    Cuisine: Mexican
    Calories: 180

    Ingredients
      

    • 1 cup frozen lime juice ensure it’s thoroughly frozen for best texture
    • 1/2 cup tequila preferably silver or blanco
    • 1 cup ice cubes adjust for desired thickness
    • 2 tbsp simple syrup optional, for sweetness
    • Salt for rimming glass salt for rimming glasses

    Equipment

    • Blender
    • Measuring cups and spoons

    Method
     

    1. Rim the glasses with a damp cloth and dip the edges into salt to coat slightly, then set aside.
    2. Add the frozen lime juice, tequila, ice cubes, and simple syrup into the blender.
    3. Stop the blender and check the consistency—if it’s too thick, add a splash of lime juice or more ice, then blend briefly again.
    4. Pour the slushie into the prepared glasses, filling them close to the rim.
    5. Optional: Garnish with a lime wedge or a small sprig of mint for a decorative touch.
    6. Serve immediately while icy and refreshing, and enjoy the burst of tart, salty flavor with each sip.

    Notes

    For a sweeter slushie, increase the simple syrup or substitute with fruity juices. You can also experiment with different fruit purees for a colorful twist.
    Whether you’re celebrating small victories or just seeking a moment of peace, this slushie will be your go-to. Its bright, zesty aroma signals that summer is never really over — it just pauses, waiting for your next sip. Enjoy the chill, the flavor, and the simple joy of making something delightful from whatever’s in your pantry.

  • Eggplant Parmesan: The Chefs’ Hidden Secret to Crispy Layers and Rich Flavors

    Eggplant Parmesan: The Chefs’ Hidden Secret to Crispy Layers and Rich Flavors

    As a food blogger always hunting for the most satisfying textures, I stumbled upon a technique that elevates eggplant Parmesan beyond the usual fare. I love how the eggplant slices get a golden, crispy edge while staying tender inside. It’s like a blissful crunch that pairs perfectly with all the cheesy, saucy layer that follows.

    Today, I’ll share a version that might challenge your comfort zone. We’re talking about a double-breading process that creates layers of crispiness and a secret ingredient that adds depth. This isn’t your average bake-it-once dish; it’s a symphony of textures and flavors waiting to be explored.

    Double-Crushed Eggplant Parmesan

    This dish features sliced eggplant that is double-breaded to achieve a crispy exterior while remaining tender inside. The eggplant is layered with marinara and cheese, then baked to golden perfection. The final result is a hearty, crunchy-on-the-outside, cheesy-on-the-inside casserole with a layered, saucy appearance.
    Prep Time 20 minutes
    Cook Time 35 minutes
    Total Time 55 minutes
    Servings: 4
    Course: Main Course
    Cuisine: Italian-American
    Calories: 420

    Ingredients
      

    • 2 eggplants preferably medium-sized
    • 1 cup all-purpose flour for initial coating
    • 3 eggs large eggs beaten
    • 2 cups bread crumbs preferably seasoned
    • 1 cup grated Parmesan cheese for breading mix
    • 2 cups marinara sauce your favorite brand or homemade
    • 1 cup shredded mozzarella cheese for layering
    • 2 tablespoons olive oil for greasing
    • salt and pepper to taste seasoning

    Equipment

    • Baking sheet
    • Shallow bowls
    • Whisk
    • Tongs
    • Cheese grater
    • Kitchen paper towels

    Method
     

    1. Slice the eggplants into 1/4-inch thick rounds and pat them dry with paper towels to remove excess moisture.
    2. Set up a breading station with three shallow bowls: one with flour, one with beaten eggs, and one with a mixture of bread crumbs and grated Parmesan.
    3. Dredge each eggplant slice in the flour, shaking off excess, then dip it into the beaten eggs, allowing any excess to drip off.
    4. Next, coat the slices in the breadcrumb mixture, pressing lightly to ensure the coating sticks evenly.
    5. Lay the breaded slices onto a baking sheet lined with parchment or lightly greased with olive oil.
    6. Repeat the dredging process with the remaining slices, then bake in a preheated oven at 400°F (200°C) for about 20-25 minutes, until golden and crispy.
    7. Remove the crispy eggplant slices from the oven and reduce oven temperature to 375°F (190°C).
    8. Layer half of the baked eggplant slices in a baking dish, drizzle with marinara sauce, then sprinkle with mozzarella cheese.
    9. Add a second layer of eggplant slices on top, then cover with the remaining marinara and cheese.
    10. Bake the assembled dish for another 15-20 minutes until bubbling, golden on top, and cheese is melted.
    11. Remove from oven, let it rest for a few minutes, then serve hot, garnished with fresh basil if desired.
    This recipe arrives just in time for cozy nights and tantalizing family gatherings. The aroma of bubbling cheese and fragrant tomato sauce makes every oven run worth it. It’s a comforting dish that whispers nostalgia and invites shared bites around the table.

    Keep this one in your back pocket for a rainy afternoon or when you need a hearty, satisfying meal with zero fuss. Eggplant Parmesan might seem simple, but when made with a little extra care, it transforms into something quite memorable. Enjoy every crispy, cheesy bite—your taste buds will thank you.

  • Spooky and Sticky: Halloween Dirt Cake with Gummy Worms

    Spooky and Sticky: Halloween Dirt Cake with Gummy Worms

    Every October, I look forward to the chaos in the kitchen as I craft my Halloween treats. This year, I decided to dive into a nostalgic dessert with a creepy twist: Dirt Cake with Gummy Worms. Its rich chocolate layers combined with colorful, squirming worms make it a hit every time.

    The best part? This dirt cake is a messy, joyful celebration of childhood, perfect for Halloween parties. The aroma of cocoa and the squish of gummy worms bring back memories of spooky fun and childhood mischief. Plus, it’s surprisingly easy to assemble, making it an ideal last-minute treat.

    Dirt Cake with Gummy Worms

    Dirt Cake with Gummy Worms is a layered no-bake dessert featuring crushed cookies, creamy chocolate filling, and colorful gummy worms for a playful, textured finish. The dish is assembled in stages, creating a moist crumbly base with smooth, rich layers and whimsical decorations that resemble a messy mound of dirt. Its final appearance is a fun, crumbly cake topped with squirming gummy worms, perfect for Halloween celebrations.
    Prep Time 20 minutes
    Total Time 20 minutes
    Servings: 8
    Course: Main Course
    Calories: 350

    Ingredients
      

    • 1 1/2 cups chocolate cookie crumbs from crushed chocolate cookies
    • 1/2 cup unsweetened cocoa powder for added chocolate flavor
    • 1/2 cup granulated sugar to sweeten the filling
    • 8 oz cream cheese softened
    • 2 cups heavy cream chilled
    • 1 cup mini chocolate chips optional, for extra richness
    • 12 gummy worms gummy worms for decoration

    Equipment

    • Mixing bowls
    • hand mixer
    • serving dish

    Method
     

    1. Combine the chocolate cookie crumbs, cocoa powder, and granulated sugar in a large mixing bowl. Stir until evenly mixed, creating a crumbly base that resembles dirt.
    2. Add the softened cream cheese to the bowl and mix with a hand mixer until smooth and well incorporated. This will create a rich, creamy layer.
    3. In a separate bowl, whip the chilled heavy cream with the hand mixer until stiff peaks form, about 3–4 minutes. Gently fold the whipped cream into the cream cheese mixture, combining carefully to maintain volume.
    4. Fold in the mini chocolate chips if using, adding extra chocolaty texture to the filling.
    5. Spread half of the cookie crumb mixture evenly into a serving dish, pressing it down slightly to form a firm base.
    6. Spoon and spread the creamy chocolate filling over the base layer, smoothing it with the back of a spoon for an even surface.
    7. Top with the remaining crumb mixture, spreading it gently to cover the creamy layer completely, creating a ‘dirt’ look.
    8. Press the gummy worms into the top layer, arranging them so they appear to be squirming up through the dirt.
    9. Refrigerate the dirt cake for at least 2 hours or until set, allowing the layers to firm up and flavors to meld.
    10. Carefully slice and serve the chilled dirt cake, marveling at the layered look and playful gummy worms.

    This simple yet playful dessert captures the spirit of Halloween — fun, a little spooky, and wholly satisfying. It’s a great way to add a touch of chaos to your celebration without hours in the kitchen. Plus, the kid in all of us loves digging into a cup of chocolatey dirt, worms and all.

    Whether you’re hosting a ghoulish gathering or just want a sweet surprise, this dirt cake is a foolproof choice. Its combination of textures and flavors keeps everyone coming back for more. Have fun creating layers of spooky goodness and watching the little ones delight in their gummy worms adventure.

  • Beyond the Basics: The Art of Crafting a Watermelon Slushie That Turns Heads

    Beyond the Basics: The Art of Crafting a Watermelon Slushie That Turns Heads

    Most watermelon recipes focus on the fruit’s sweet, juicy core, but what if we pivot to the icy, slushy realm? This recipe is not just about cooling down; it’s about transforming fresh watermelon into a textured masterpiece that’s perfect for hot days or unexpected guests.

    Imagine a slushie that carries the scent of summer’s first watermelon, chilled to a silky consistency, with just a whisper of mint or lime for that extra zing. It’s the kind of treat that sparks up a casual brunch or elevates a backyard barbecue to a new level of fun.

    Let’s experiment with textures and flavors, ditch the ordinary and embrace a refreshingly unconventional approach to watermelon. When you master this simple method, you’ll find it’s just as delightful to make as it is to sip.

    Watermelon Slushie

    This watermelon slushie is made by blending fresh, seedless watermelon chunks with ice and flavorings until smooth, resulting in a cold, icy beverage with a vibrant red hue and a silky, slushy consistency. The mixture is often garnished with mint or lime for added freshness, making it a refreshing and visually appealing summer treat.
    Prep Time 10 minutes
    Total Time 10 minutes
    Servings: 2
    Course: Main Course
    Cuisine: Summer
    Calories: 120

    Ingredients
      

    • 3 cups seedless watermelon chunks roughly 1-inch pieces
    • 1 cup ice cubes adjust for desired thickness
    • 1 tablespoon lime juice optional, adds zing
    • 1 small mint sprig for garnish

    Equipment

    • Blender
    • Measuring Cup

    Method
     

    1. Add the watermelon chunks and ice cubes into a blender.
    2. Pour in the lime juice for a bright, tangy flavor.
    3. Blend on high speed until the mixture is completely smooth and has a thick, slushy texture, about 30-60 seconds.
    4. Check the consistency—if it’s too thick, add a splash of water and blend briefly to loosen; if too runny, add more ice and blend again.
    5. Pour the vibrant pink slushie into chilled glasses.
    6. Garnish each glass with a sprig of fresh mint for a fragrant touch.
    7. Serve immediately with a straw and enjoy this cooling summer treat.

    There’s something so satisfying about turning ripe watermelon into a frozen delight that’s almost too pretty to eat. This recipe is surprisingly forgiving and perfect for experimenting with different herbs and citrus to suit your mood.

    As the season shifts, this slushie remains a vibrant reminder that simplicity, combined with a hint of creativity, makes for some of the best summer memories. Keep it in your back pocket for spontaneous gatherings or when you need a quick palate refresher.