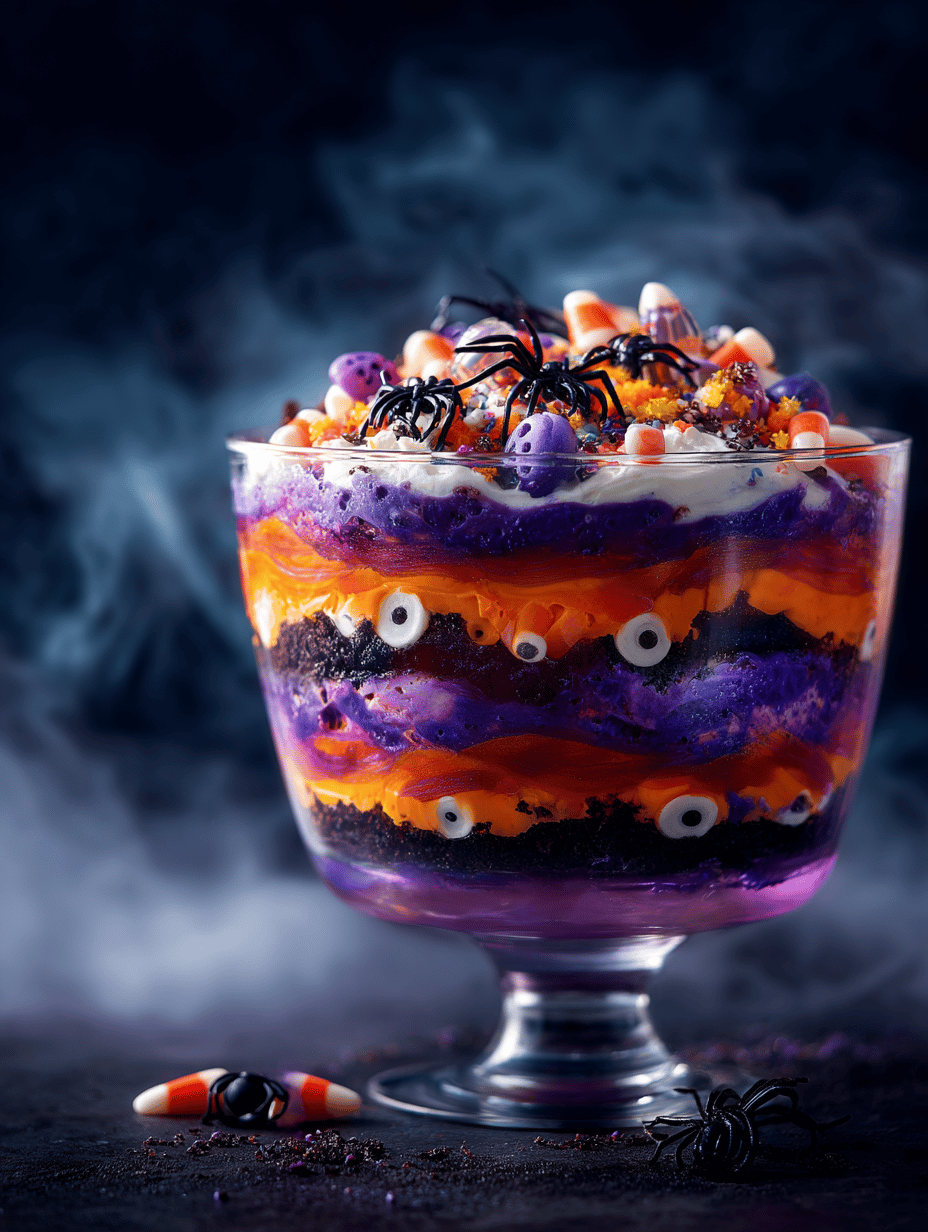
Halloween is the one time I love to get a little wild in the kitchen, and this trifle is my chaos on a plate. It’s a patchwork of textures and flavors that somehow come together, like a good costume—more fun when a little messy. I’ve made this for years, tweaking it every season, and it’s always a hit.
What I love most is how flexible it is—use what you have, add your own creepy twists. It’s a way to celebrate the season with something sweet and spooky, no fancy skills required, just a bit of playful layering.
Why this spooky treat draws me back each season
The playful chaos of layering, the surprise in every spoon, and the way it sparks childhood memories. It’s imperfect, fun, and always a little messy—just like Halloween itself. It’s my go-to for a quick, festive showstopper that never fails to get smiles, even from the most skeptical guests.
Breaking down the spooky essentials
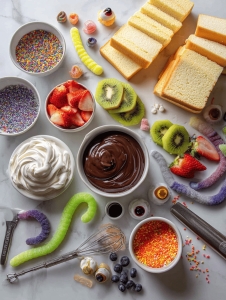
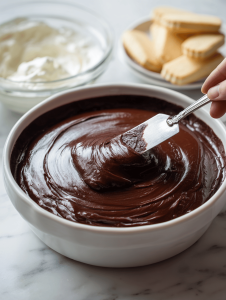
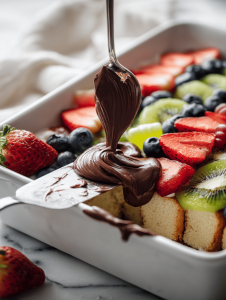
- Chocolate pudding: Creamy, rich, and velvety. Use store-bought or homemade for that deep cocoa hit.
- Sponge cake or ladyfingers: Soft base that absorbs flavors. Swap with brownies for a denser texture.
- Fruit slices (oranges, berries): Fresh and tart to cut through the sweetness. Brightens up every bite.
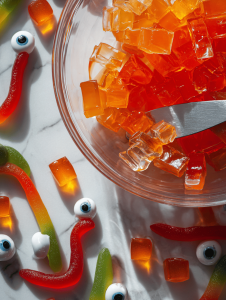
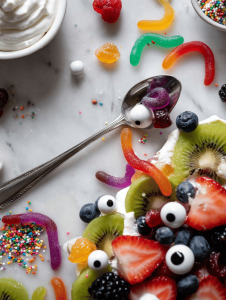
- Gummy worms or candy eyeballs: Add that creepy surprise and chewy texture. Use sugar candies for quick fixes.
- Whipped cream: Light, airy topping. Keep it loose for easy piping or dollops.
- Decorative candies and sprinkles: For visual chaos—think bright, shiny, and spooky.
- Edible glitter or colored sugar: Shimmer and shimmer—make it sparkle under the flickering lights.
Tools and equipment for your Halloween trifle
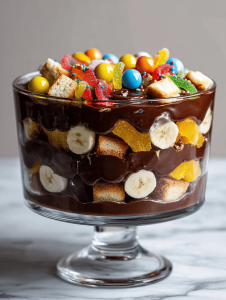
- Large glass trifle dish or clear bowls: Show off the colorful layers and spooky ingredients.
- Mixing bowls: Combine pudding, fruit, and other layers smoothly.
- Whisk or spatula: Mix ingredients evenly without knocking out too much air.
- Spoons for layering and serving: Build the layers carefully and serve with flair.
- Decorating tools (pastry bag, piping tips): Add whipped cream or decorations precisely.
Step-by-step: Assembling your Halloween Trifle
Step 1: Gather your ingredients and equipment first. It’s easier to layer when everything’s close at hand.
Step 2: Prepare your spooky elements—think gummy worms, candy eyeballs, or orange jelly cubes—to add surprises in each spoonful.
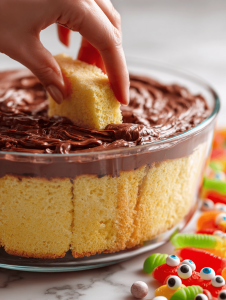
Step 3: Start with the base layer: a rich, velvety pudding or custard, chilled and ready to set.
Step 4: Layer your ingredients in a large, clear glass trifle dish or individual cups for a dramatic effect.
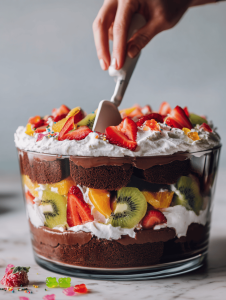
Step 5: Alternate layers of cake, pudding, fruit, and your spooky surprises. Keep it loose and fun.
Step 6: Chill the assembled trifle for at least 2 hours—better if overnight—to let flavors meld.
Step 7: Before serving, decorate the top with whipped cream, edible glitter, or themed candies for that final creepy touch.
Cooking checkpoints and tips for a perfect spooky treat
- Ensure pudding is fully chilled before layering to avoid melting or sliding.
- Layer ingredients in a way that each spoonful gets a bit of everything for maximum flavor surprise.
- Watch for over-mixing the pudding; it should be smooth but not whipped to deflate the richness.
- Keep the assembled trifle chilled until ready to serve to maintain freshness and prevent spoilage.
Common Halloween trifle mistakes and how to fix them
- Layering warm pudding melts the other ingredients.? FORGOT to chill pudding—fix by refrigerating for at least 30 minutes before layering.
- Too many candies can make layers soggy.? DUMPED too much candy—fix by adding less at once and spreading it out.
- Burnt or stiff topping ruins the look.? OVER-TORCHED the whipped topping—fix by keeping a close eye and removing early.
- Overstuffed layers make it messy and unappetizing.? CROWDED layers—fix by spacing ingredients evenly for balanced bites.
Halloween Spooky Trifle
Ingredients
Equipment
Method
- Gather all your ingredients and equipment, setting everything within easy reach to make assembly smooth and fun.
- Prepare your spooky elements like gummy worms, candy eyeballs, or orange jelly cubes so they’re ready to be added as surprises in each spoonful.
- Start by spooning a layer of rich, velvety chocolate pudding at the bottom of your clear glass dish, spreading it evenly with the back of a spoon.
- Add a layer of sponge cake or ladyfingers on top of the pudding, breaking them into pieces if needed to fill the space nicely.
- Top the cake layer with a handful of fruit slices, spreading them out evenly to add tartness and color contrast.
- Sprinkle or nestle in gummy worms or candy eyeballs to create creepy surprises that peek out from the layers.
- Repeat the layering process—pudding, cake, fruit, and surprises—until the dish is filled, leaving some space at the top for decoration.
- Cover the assembled trifle with plastic wrap and chill in the refrigerator for at least 2 hours, or overnight, to allow flavors to meld and layers to set.
- Before serving, spread whipped cream over the top, piping it decoratively if desired, and sprinkle with bright candies, sprinkles, and edible glitter for a spooky shimmer.

- Finish with a final sprinkle of edible glitter to make your spooky trifle sparkle under the flickering lights.
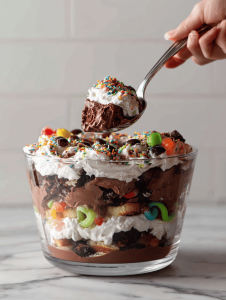
- Serve immediately with spoons, encouraging guests to dig into the chaos and enjoy the sweet, spooky layers!
Notes

Welcome to Owning This Stove. I’m so glad you’re here. I’m a food blogger, recipe developer, and storyteller who believes food is one of the most honest ways to understand a place, a person, or a moment in time. This blog is where I collect those moments, from quiet mornings in unfamiliar kitchens to crowded cafés filled with conversation and clinking cups.