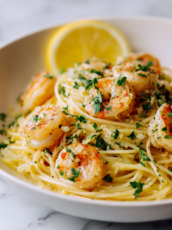
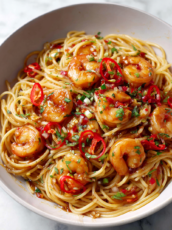
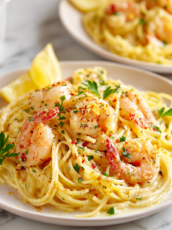
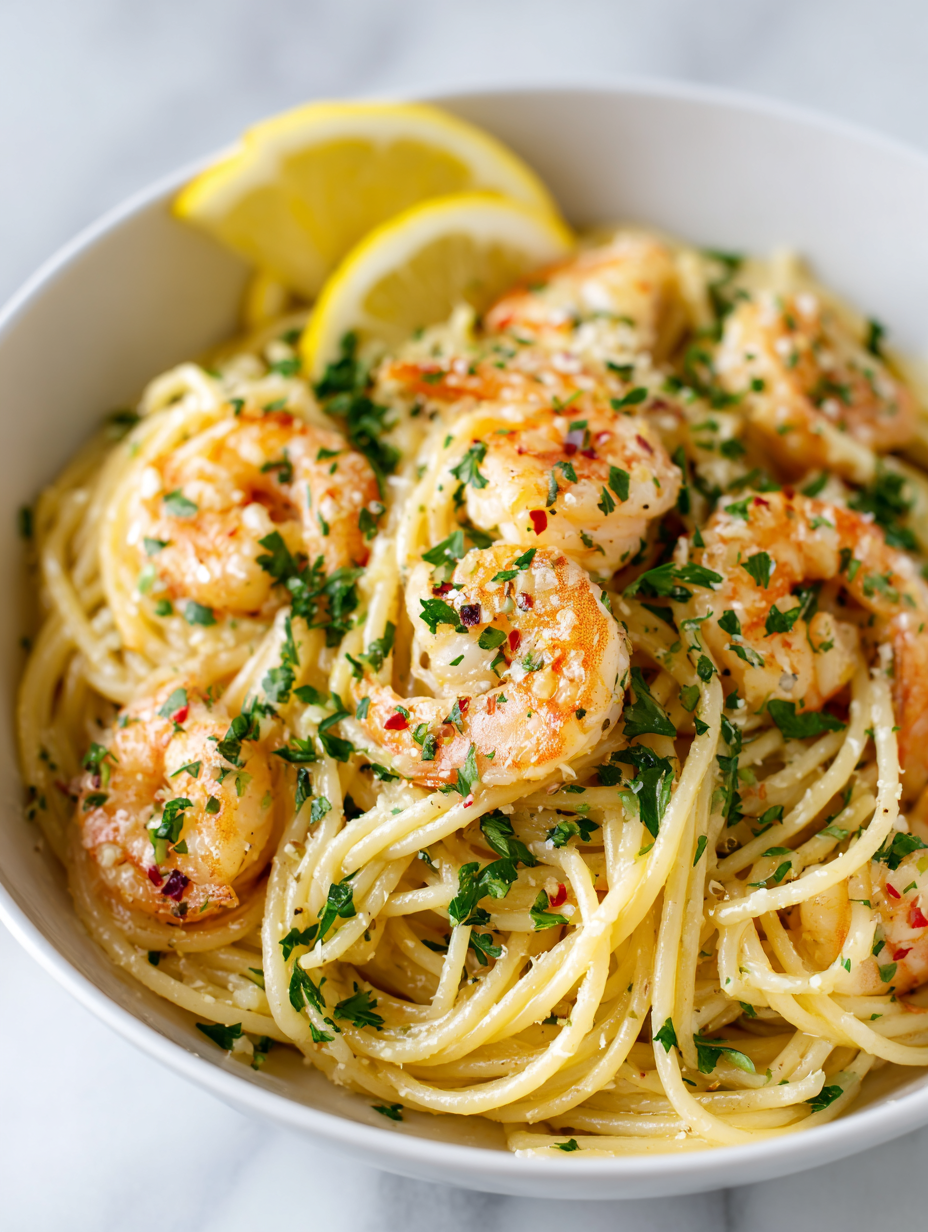
Blog

  • Unconventional Cozy Twist: Taco Soup That’s Surprisingly Heartwarming

    Unconventional Cozy Twist: Taco Soup That’s Surprisingly Heartwarming

    Imagine a bowl of taco soup that combines a nostalgic roadside stand aroma with an unexpected depth of flavor. This recipe transforms common ingredients into a comforting meal that warms you from the inside out, perfect for those chilly evenings. The secret lies in a unique spice blend that elevates the usual taco fare into something truly memorable.

    Baking hours of busy weekdays into a single-pot masterpiece is a relief. This taco soup recipe is about embracing chaos in the kitchen with a smile, knowing that every spoonful is packed with personality. It’s not just a meal but a cozy throwback to simpler times, reimagined with a surprising flair.

    Taco Soup

    Taco soup is a hearty, flavorful dish made by simmering ground meat, beans, corn, and tomatoes with a blend of spices. It results in a thick, comforting soup with a slightly spicy and savory profile, topped with cheese, sour cream, or fresh herbs for added flavor.
    Prep Time 15 minutes
    Cook Time 30 minutes
    Total Time 45 minutes
    Servings: 6
    Course: Main Course
    Cuisine: Mexican
    Calories: 300

    Ingredients
      

    • 1 pound ground beef or ground turkey
    • 1 can diced tomatoes 14.5 oz can
    • 1 can black beans drained and rinsed, 15 oz can
    • 1 can corn kernels 14 oz can, drained
    • 1 cup chicken broth
    • 1 package taco seasoning 1 oz packet
    • 1 small onion finely chopped
    • 2 cloves garlic minced
    • to taste salt and pepper

    Equipment

    • Large pot or Dutch oven
    • Wooden spoon or spatula

    Method
     

    1. Heat a large pot over medium heat and add the ground meat, breaking it apart as it cooks until browned and cooked through, about 5-7 minutes.
    2. Add the chopped onion and minced garlic to the pot with the meat and cook until the onion becomes translucent and fragrant, about 3 minutes.
    3. Stir in the taco seasoning until the meat and onions are evenly coated, allowing the spices to toast slightly and release their aroma.
    4. Pour in the diced tomatoes, black beans, corn, and chicken broth, stirring everything together to combine well.
    5. Bring the mixture to a boil, then reduce the heat to low and let it simmer uncovered for about 20 minutes, allowing the flavors to meld and the soup to thicken slightly.
    6. Taste the soup and season with salt and pepper as needed, adjusting the seasoning to your preference.
    7. Serve the hot taco soup in bowls, garnished with your favorite toppings such as shredded cheese, sour cream, chopped cilantro, or sliced jalapeños.
    This taco soup has become a favorite among friends for its ability to bring comfort with a little unexpected twist. It’s perfect for casual family nights or when you want a taste of home that’s both easy and a bit daring.

    As winter’s chill settles in, a hot bowl of this soup feels like a warm embrace. Its complex aroma and hearty texture make it a brilliant choice for turning a busy day into a moment of pure satisfaction. Sometimes, the simplest dishes make the deepest memories.

  • The Secret to a Refreshing Summer Strawberry Slushie

    The Secret to a Refreshing Summer Strawberry Slushie

    Every once in a while, I stumble upon a flavor combination that sparks a childhood memory and adds a zing to my summer days. The strawberry slushie is one of those little joys, blending ripe berries with just enough ice to create a chilly burst of sweetness. It’s perfect for those hot afternoons when hydration and flavor collide.

    But this isn’t just any strawberry slushie. I like to think of it as a science experiment with a splash of nostalgia—a recipe that’s flexible, forgiving, and surprisingly moreish. It’s ideal for spontaneous gatherings or a quick treat after a long day of yard work, summoning the smell of fresh strawberries and the crackle of icy crunch in every sip.

    Strawberry Slushie

    A strawberry slushie is a frozen beverage that blends ripe strawberries with crushed ice to create a refreshing, icy texture. The mixture results in a bright pink, slushy drink with a sweet and slightly tart flavor, perfect for hot summer days.
    Prep Time 10 minutes
    Total Time 10 minutes
    Servings: 2
    Course: Main Course
    Cuisine: American
    Calories: 70

    Ingredients
      

    • 2 cups fresh strawberries hulled and rinsed
    • 1 cup ice cubes preferably crushed or small-sized
    • 1 tablespoon honey or agave syrup optional for added sweetness

    Equipment

    • Blender
    • Measuring cups

    Method
     

    1. Place the fresh strawberries into the blender.
    2. Add the ice cubes on top of the strawberries.
    3. Drizzle in honey or agave syrup if you prefer extra sweetness.
    4. Secure the lid on the blender and blend on high until the mixture is smooth and slushy, about 30-45 seconds.
    5. Stop the blender and check the texture—if it’s too thick, add a splash of cold water or more strawberries and blend briefly again.
    6. Pour the strawberry slushie into glasses, revealing a vibrant pink, icy beverage.
    7. Serve immediately with a straw or garnish with a fresh strawberry for a perfect summer treat.

    Notes

    For an extra flavor twist, add a squeeze of lemon juice or a handful of mint leaves before blending.

    This strawberry slushie is more than just a beverage; it’s a little pocket of cool happiness that fits perfectly into the summer rhythm. The bright scent of strawberries and the crunch of ice seem to slow down time, even amidst a busy day. It’s all about savoring simple joys before the heat makes everything else seem overwhelming.

    As the season deepens, these slushies become a nostalgic reminder of childhood summers, yet evolve into a versatile treat suitable for all ages. No matter how many times I make it, the recipe feels fresh and rewarding, a tiny rebellion against the sweltering heat. Sometimes, keeping it simple is just the best way to beat the season’s relentless pace.

  • Spooky Delight: Halloween Monster Eyeball Cake Pops

    Spooky Delight: Halloween Monster Eyeball Cake Pops

    Every October, I find myself craving projects that blend chaos and cuteness. These Halloween Monster Eyeball Cake Pops do just that, with their quirky, bloodshot eyes and squishy texture. They remind me of childhood monster stories that still make me peek around corners.

    Crafting them feels like a tiny part of a haunted house. The squeals of delight from friends and family come with every eye you pop onto a stick. These treats turn a simple party into a full-blown Halloween spectacle, blending horror with humor in each bite.

    WHY I LOVE THIS RECIPE?

    • Pure chaos, straight from my kitchen, turned into adorable monster eyes.
    • Joyful moments when friends guess the hidden flavors—chocolate, cherry, and a touch of chaos.
    • Relief that these pops are surprisingly easy, so I can focus on costumes, not cleanup.
    • Feeling nostalgic for childhood monsters and candy adventures.
    • The pride of creating something spooky yet edible with my own two hands.

    AVOID MY DISASTER (You’re Welcome)

    • FORGOT to chill the cake ball mixture—the eyes fell apart; refrigerate forthwith.
    • DUMPED melted chocolate on the vacuumed table—used parchment to save it.
    • OVER-TORCHED the candy eyes; bell pepper sponge helps fix the cracked openings.
    • FORGOT to secure the eyeball with enough icing; double-dip for sturdiness.

    QUICK FIXES THAT SAVE YOUR DAY

    • When eyes crack, splash a little edible glue and press gently—shimmer restored.
    • If icing is too thick, thin it with a tiny drop of milk for perfect spreading.
    • When chocolate won’t set, chill for five minutes in the fridge—crackle less.
    • Shield cracked eyes with a thin layer of white chocolate—saves the look.
    • If you’re out of food coloring, use a pinch of freeze-dried powder for vibrant hues.

    These Monster Eyeball Cake Pops are a treat that captures the playful spirit of Halloween. Their slightly creepy yet charming appearance makes them perfect for parties or a fun kids’ baking day. The festive season gets even more delicious with a batch of these peculiar, colorful candies.

    In the end, it’s about embracing messy creativity and sharing a laugh with loved ones. No matter what goes wrong in the kitchen, the joy of making spooky sweets is what keeps the season alive. So, gather your ingredients and get ready for some friendly monster mischief.

    Halloween Monster Eyeball Cake Pops

    These cake pops are made by combining crumbled cake with frosting to form a dough, which is then shaped into small balls. They are coated in melted chocolate and decorated to resemble creepy eyeballs with bloodshot, textured appearances. The final treat has a chewy, moist interior with a glossy, detailed exterior that mimics realistic eyeballs.
    Prep Time 30 minutes
    Cook Time 10 minutes
    Total Time 40 minutes
    Servings: 10
    Course: Main Course
    Cuisine: Halloween
    Calories: 150

    Ingredients
      

    • 2 cups crumbled cake (e.g., chocolate or vanilla) cooled and crumbled into fine pieces
    • 0.5 cup buttercream frosting to bind the cake crumbles
    • 16 oz melted chocolate (dark or white) for coating the cake balls
    • 10 pieces lollipop sticks
    • 1 cup red-colored candy melted or colored white chocolate for bloodshot effect
    • optional food coloring or powdered freeze-dried icing color to dye the chocolate or candy

    Equipment

    • Mixing bowls
    • Chocolate melting tools
    • Lollipop sticks
    • Baking sheet
    • Cooling rack
    • Small piping bags or brushes

    Method
     

    1. Mix the crumbled cake with the buttercream frosting until well combined and crumbly but able to hold together when shaped.
    2. Roll the mixture into small, even-sized balls about the size of a golf ball and place them on a baking sheet lined with parchment paper.
    3. Insert a lollipop stick into each cake ball, pushing about halfway in, and chill in the refrigerator for at least 30 minutes to firm up.
    4. Place the chilled cake pops in a holder or stand and dip each into the melted chocolate, tapping off excess to create a smooth, shiny coating.
    5. Set the coated cake pops on a cooling rack and let the chocolate set completely, about 15-20 minutes.
    6. Use a piping bag or a small brush to add red-colored candy or melted red chocolate around the edges of the eyes for a bloodshot effect, and create bloodshot lines by piping thin red lines across the eyeballs.
    7. For the eyeballs’ detailed appearance, add small dots of contrasting colored chocolate or icing to simulate blood vessels and give the monster eye a creepy, textured look.
    8. Allow the decorated cake pops to set for an additional 10 minutes, ensuring all decorations are firm.
    9. Enjoy your spooky, creepy eyeball cake pops, perfect for Halloween parties or a fun baking activity with kids.

    As the lights dim and Halloween night falls, these eyeball cake pops bring a dash of whimsy to the spooky atmosphere. Each bite offers a surprising crunch and a sweet, slightly fruity flavor that’s irresistible. They’re not just treats; they’re conversation starters and memory makers.

    Remember, the chaos in the kitchen often leads to the most memorable creations. Let your imagination run wild and enjoy every moment of your Halloween baking adventure. After all, some of the best stories come from the funniest mistakes.

  • Hello world!

    Welcome to WordPress. This is your first post. Edit or delete it, then start writing!