This Shrimp and Asparagus Recipe is all about celebrating the freshness of spring produce without fuss. I love how just a few simple ingredients can come together so quickly, giving you a meal that’s bright, crisp, and tender in all the right places. It’s one of those dishes that reminds me that good cooking doesn’t need to be complicated, just precise with timing and heat.
What makes this dish special isn’t just how fast it comes together, but how it captures the essence of seasonal produce—the sweetness of the shrimp and the snap of fresh asparagus. I’ve learned that hitting the right temperature and timing is key to keeping both ingredients at their best. It’s a perfect meal for busy weeknights or when you want something wholesome with minimal effort.
Focusing on the simplicity of fresh ingredients, this recipe highlights the importance of timing and temperature to perfectly capture the shrimp’s tenderness and the asparagus’s crispness, making it a go-to quick meal that celebrates seasonal produce.
A Fresh Take on Spring’s Bounty
- This dish brings back childhood memories of spring dinners, the smell of fresh asparagus wafting through the kitchen.
- I love how a splash of lemon brightens up the shrimp, transforming the simple into something special.
- There’s a quiet pride in perfecting the timing—getting the shrimp just tender, the asparagus crisp and vibrant.
Inspiration Behind This Dish
This recipe was born out of a busy weeknight need for something quick but flavorful. I kept thinking about how fresh, crisp asparagus and sweet shrimp could make a simple dish that feels special without much fuss. One evening, I threw these ingredients together on a whim, and the balance of textures and bright flavors just clicked. Since then, I’ve kept coming back to this combo, tweaking the timing and seasoning each time to get it just right.
Historical & Cultural Insights
- This dish’s roots trace back to quick French bistros where simplicity and seasonal ingredients reign supreme.
- The combination of shrimp and asparagus became popular in coastal regions where fresh seafood and spring produce meet.
- In the early 20th century, this pairing gained traction as a healthy, elegant dinner option for busy households.
- Historically, asparagus was considered a delicacy and reserved for special occasions, making this dish feel a bit festive.
- Modern twists often include garlic, lemon, or chili, but the core idea remains a celebration of fresh, minimal ingredients.
Key Ingredients and Tips
- Shrimp: I prefer peeled and deveined, so you get that sweet, tender bite without extra fuss. If they curl up too tightly, they’re overcooked—aim for a firm jiggle.
- Asparagus: Fresh, bright green spears with a slight snap when bent. Thinner stalks cook faster; thicker ones need a minute or two more for perfect crisp-tender feel.
- Garlic: Minced just before adding—its aroma should be fragrant and inviting, not burnt. If it turns bitter, lower your heat or remove sooner.
- Lemon: Juiced right at the start brightens everything. Skip it if you prefer a subtler flavor or add at the end for a fresh punch that shimmers on the tongue.
- Olive oil: Use good-quality extra virgin—its fruity, peppery notes add depth. Too little, and the ingredients stick; too much, and it’s greasy.
- Seasonings: Simple salt and freshly cracked black pepper do the trick. A pinch of red pepper flakes can add a gentle heat if you like a bit of kick.
- Optional herbs: Parsley or dill add freshness. Chop just before serving to keep their vibrant flavor and bright color.
Spotlight on key ingredients
Shrimp:
- I prefer peeled and deveined, so you get that sweet, tender bite without extra fuss. If they curl up too tightly, they’re overcooked—aim for a firm jiggle.
- Asparagus: Fresh, bright green spears with a slight snap when bent. Thinner stalks cook faster; thicker ones need a minute or two more for perfect crisp-tender feel.
Asparagus:
- Its tender-crisp texture and earthy aroma make it the backbone of this dish. Watch for overcooking—no one wants limp, dull stalks that lose their snap.
- Lemon: Juiced right at the start, it brightens everything with a zingy, citrusy burst. Its fresh fragrance should shimmer through every bite, not just linger on the surface.
Notes for ingredient swaps
- Seafood-Free: Replace shrimp with firm tofu or tempeh for a vegetarian version that still offers satisfying texture and protein.
- Gluten-Free: Use coconut aminos instead of soy sauce to keep this dish gluten-free without sacrificing umami richness.
- Dairy-Free: Skip butter or creamy sauces; rely on olive oil and lemon for bright, clean flavors that won’t clash.
- Low-Sodium: Opt for unsalted butter or minimal added salt, and enhance flavor with fresh herbs and citrus instead.
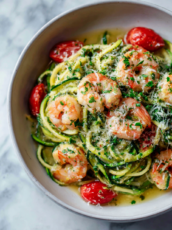
- Vegan: Use vegan shrimp alternatives or extra vegetables like bell peppers and snap peas for a colorful, plant-based twist.
- Lemon Substitute: Lime juice can replace lemon for a slightly different tartness that pairs well with the seafood.
- Asparagus Alternatives: Green beans or snap peas can be quick-cooked for a similar crunch and fresh flavor.
Equipment & Tools
- Large skillet: To cook the shrimp and asparagus evenly
- Tongs or spatula: To flip and toss ingredients without breaking them
- Small bowl: To hold lemon juice or pre-measured seasonings
- Knife: To trim asparagus and mince garlic
Step-by-step guide to shrimp and asparagus
- Gather your equipment: a large skillet (preferably non-stick), tongs or a spatula, a small bowl for lemon juice, and a knife for prep.
- Prep ingredients: peel and devein 1 pound of shrimp, trim 1 bunch of asparagus (about 1 inch below the spears), mince 2 cloves garlic, and set aside.
- Heat the skillet over medium-high heat (~200°C / 390°F). Add 1 tablespoon of olive oil, let it shimmer but not smoke.
- Add the shrimp in a single layer, cook for 2 minutes without moving, until edges turn pink and opaque. Flip and cook another 1-2 minutes. Remove and set aside.
- In the same pan, add another teaspoon of oil if needed. Toss in the minced garlic, cook for 30 seconds until fragrant—be careful not to burn it.
- Add the asparagus, cook for 3-4 minutes, stirring occasionally. It should turn bright green, with some tender yet crisp parts remaining.
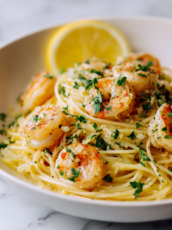
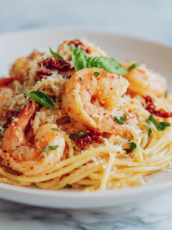
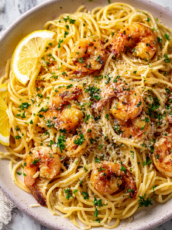
- Return the shrimp to the pan, squeeze in the lemon juice (about 1 tablespoon), and toss everything together for 1 minute to combine flavors.
- Taste and adjust seasoning with salt, pepper, or chili flakes if desired. The shrimp should be tender and the asparagus crisp but cooked through.
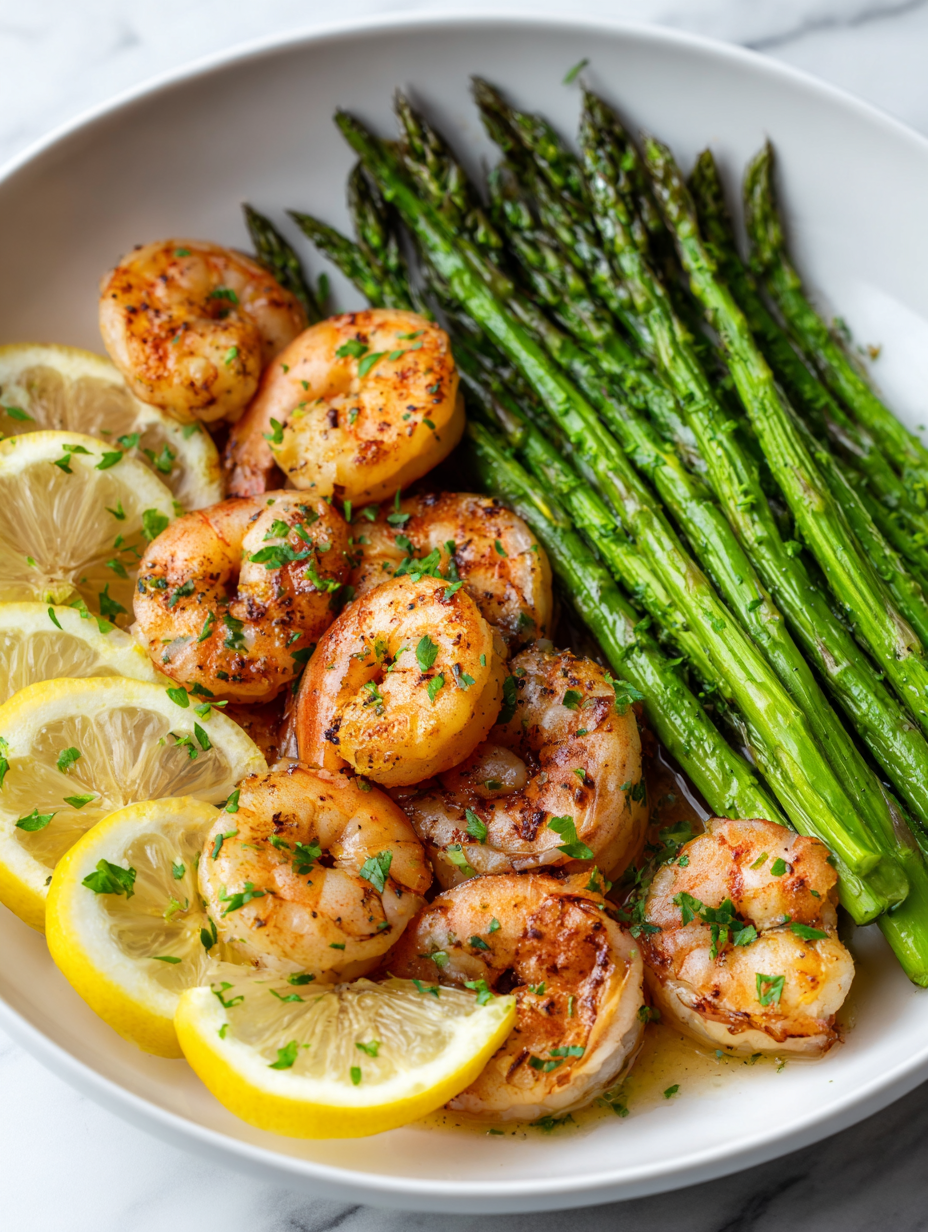
- Remove from heat. Let rest for a minute, then transfer to a plate, garnish with herbs if using, and serve immediately.
Transfer to a warm plate, garnish with chopped herbs if desired, and serve right away while still bright and crisp.
How to Know It’s Done
- Shrimp: opaque and firm, with a slight jiggle when gently pressed.
- Asparagus: vibrant green with a slight snap when bent, not limp or overly soft.
- Aromas: garlic fragrant, lemon bright, and oil shimmering—indicators of proper cooking temperature and timing.
Shrimp and Asparagus Skillet
Ingredients
Equipment
Method
- Heat a large skillet over medium-high heat and add 1 tablespoon of olive oil, allowing it to shimmer and become fragrant.
- Add the peeled and deveined shrimp in a single layer and cook untouched for about 2 minutes, until the edges turn pink and slightly opaque.
- Flip the shrimp with tongs and cook for another 1-2 minutes until fully opaque and just tender. Remove the shrimp from the skillet and set aside.
- In the same skillet, add another teaspoon of olive oil if needed, then toss in the minced garlic and cook for about 30 seconds until fragrant, stirring constantly to avoid burning.
- Add the trimmed asparagus spears to the skillet and cook for 3-4 minutes, stirring occasionally, until they turn bright green and are tender yet still crisp.
- Return the cooked shrimp to the skillet, squeeze in the fresh lemon juice, and toss everything together to combine flavors, cooking for an additional minute.
- Season with salt, pepper, and red chili flakes if using, tasting as you go to balance the flavors. The dish should smell fragrant and look vibrant.
- Remove from heat, sprinkle with chopped herbs if desired, and serve immediately while the shrimp is tender and the asparagus is crisp-tender.
Notes
Pro tips for perfect shrimp and asparagus
- Bolded mini-head: Use high heat for quick searing, which locks in juices and creates a flavorful crust.
- Bolded mini-head: Don’t overcrowd the pan; cook in batches if needed to keep the ingredients from steaming instead of searing.
- Bolded mini-head: Add garlic towards the end of cooking to prevent burning and bitterness, releasing its fragrant oils.
- Bolded mini-head: Squeeze lemon juice off the heat to preserve its bright, fresh flavor without dulling the dish.
- Bolded mini-head: Test asparagus for doneness by snapping a stalk—if it breaks easily and is vibrant, it’s perfect.
- Bolded mini-head: Cook shrimp until just opaque and slightly firm—overcooking leads to rubbery texture, so watch carefully.
- Bolded mini-head: Finish the dish with a quick toss, allowing all flavors to meld, before serving for maximum brightness.
Common mistakes and how to fix them
- FORGOT to watch shrimp: overcooked shrimp turn rubbery—remove from heat promptly.
- DUMPED asparagus: overcooking makes it limp—test for a bright green color and slight snap.
- OVER-TORCHED garlic: burns quickly, creating bitterness—add last and stir constantly.
- MISSED seasoning: under-seasoned dishes taste flat—taste and adjust salt at the end.
Quick fixes and pantry swaps
- When shrimp turn rubbery, immediately remove and lower heat slightly.
- Splash a bit of lemon juice if the dish tastes flat and dull.
- Patch overcooked asparagus with a squeeze of fresh lemon for brightness.
- Shield burnt garlic by adding a splash of water and reducing heat quickly.
- DUMPED too much oil? Blot with paper towels and start with a fresh pan for crispness.
Prep, store, and reheat tips
- Prep the shrimp: peel and devein up to a day ahead, keep refrigerated in an airtight container—shrimp stay fresh for 1-2 days and should smell clean and briny when fresh.
- Trim the asparagus: wash and cut into desired lengths, store in a damp paper towel inside a plastic bag—keeps crisp for 1-2 days, and avoid sogginess.
- Cooked leftovers: store cooled dish in an airtight container in the fridge for up to 1 day—notice the asparagus softening and shrimp losing some texture upon reheating.
- Reheating: gently warm in a skillet over low heat or in the microwave at 50% power—look for steam and smell the bright citrus and garlic re-emerge, avoiding overcooking to prevent rubbery shrimp.
Top questions about shrimp and asparagus
1. How do I tell when shrimp are done?
Peel and devein the shrimp for a cleaner bite and better texture. If they curl up tightly, they’re overcooked—aim for a firm jiggle.
2. How can I tell if the asparagus is cooked perfectly?
Look for bright green, tender stalks with a slight snap. If limp and dull, they’ve gone too far.
3. When should I add garlic?
Add garlic towards the end of cooking to avoid burning. It should smell fragrant and inviting, not bitter.
4. Should I add lemon during or after cooking?
Squeeze lemon juice right before serving to keep it bright and fresh. Overcooking lemon will dull its zing.
5. What heat should I cook at?
Use high heat (around 200°C / 390°F) to sear quickly and lock in juices. Don’t overcrowd the pan to prevent steaming.
6. How long can I keep leftovers?
Store peeled shrimp in an airtight container in the fridge for up to 2 days. Keep asparagus wrapped in a damp towel for 1-2 days.
7. How should I reheat leftovers?
Reheat gently in a skillet over low heat or in the microwave at 50% power. Look for steam and aroma revival, not overcooking.
8. What do I do if I overcook the seafood or vegetables?
If shrimp turn rubbery, remove from heat immediately and lower the temperature. For overcooked asparagus, add a squeeze of lemon to refresh.
9. What are signs of fresh ingredients?
Use fresh, bright green asparagus with a slight snap. Shrimp should be opaque and firm, not mushy or slimy.
10. How can I prevent garlic from burning?
Avoid burning garlic by adding it late in cooking and stirring constantly. Use a good quality olive oil for richer flavor.
This dish is a reminder that good things can come together with just a few simple ingredients and attention to timing. It’s a quick, bright meal that feels like spring on a plate, especially when fresh asparagus is in season. Sometimes, the simplest preparations deliver the most satisfying bites.
Cooking this way keeps the focus on what matters—crisp, tender, and flavorful. No fuss, no fussiness, just honest food that’s easy to love and easy to make. It’s a dish I find myself coming back to, especially when I want something nourishing without the extra steps.

Welcome to Owning This Stove. I’m so glad you’re here. I’m a food blogger, recipe developer, and storyteller who believes food is one of the most honest ways to understand a place, a person, or a moment in time. This blog is where I collect those moments, from quiet mornings in unfamiliar kitchens to crowded cafés filled with conversation and clinking cups.